mirror of
https://github.com/LukeHagar/toyo-discord-bot.git
synced 2025-12-06 04:21:49 +00:00
146 lines
5.6 KiB
Markdown
146 lines
5.6 KiB
Markdown
# Cloudflare worker example app
|
|
|
|
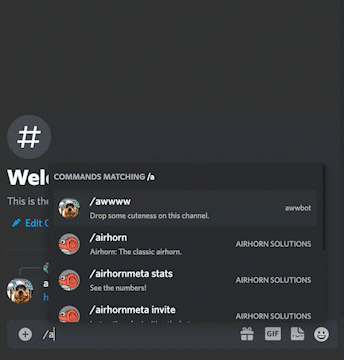
awwbot is an example app that brings the cuteness of `r/aww` straight to your Discord server, hosted on Cloudflare workers. Cloudflare Workers are a convenient way to host Discord bots due to the free tier, simple development model, and automatically managed environment (no VMs!).
|
|
|
|
The tutorial for building awwbot is [in the developer documentation](https://discord.com/developers/docs/tutorials/hosting-on-cloudflare-workers)
|
|
|
|
|
|
|
|
## Resources used
|
|
|
|
- [Discord Interactions API](https://discord.com/developers/docs/interactions/receiving-and-responding)
|
|
- [Cloudflare Workers](https://workers.cloudflare.com/) for hosting
|
|
- [Reddit API](https://www.reddit.com/dev/api/) to send messages back to the user
|
|
|
|
---
|
|
|
|
## Project structure
|
|
|
|
Below is a basic overview of the project structure:
|
|
|
|
```
|
|
├── .github/workflows/ci.yaml -> Github Action configuration
|
|
├── src
|
|
│ ├── commands.js -> JSON payloads for commands
|
|
│ ├── reddit.js -> Interactions with the Reddit API
|
|
│ ├── register.js -> Sets up commands with the Discord API
|
|
│ ├── server.js -> Discord app logic and routing
|
|
├── test
|
|
| ├── test.js -> Tests for app
|
|
├── wrangler.toml -> Configuration for Cloudflare workers
|
|
├── package.json
|
|
├── README.md
|
|
├── .eslintrc.json
|
|
├── .prettierignore
|
|
├── .prettierrc.json
|
|
└── .gitignore
|
|
```
|
|
|
|
## Configuring project
|
|
|
|
Before starting, you'll need a [Discord app](https://discord.com/developers/applications) with the following permissions:
|
|
|
|
- `bot` with the `Send Messages` and `Use Slash Command` permissions
|
|
- `applications.commands` scope
|
|
|
|
> ⚙️ Permissions can be configured by clicking on the `OAuth2` tab and using the `URL Generator`. After a URL is generated, you can install the app by pasting that URL into your browser and following the installation flow.
|
|
|
|
## Creating your Cloudflare worker
|
|
|
|
Next, you'll need to create a Cloudflare Worker.
|
|
|
|
- Visit the [Cloudflare dashboard](https://dash.cloudflare.com/)
|
|
- Click on the `Workers` tab, and create a new service using the same name as your Discord bot
|
|
|
|
## Running locally
|
|
|
|
First clone the project:
|
|
|
|
```
|
|
git clone https://github.com/discord/cloudflare-sample-app.git
|
|
```
|
|
|
|
Then navigate to its directory and install dependencies:
|
|
|
|
```
|
|
cd cloudflare-sample-app
|
|
npm install
|
|
```
|
|
|
|
> ⚙️ The dependencies in this project require at least v18 of [Node.js](https://nodejs.org/en/)
|
|
|
|
### Local configuration
|
|
|
|
> 💡 More information about generating and fetching credentials can be found [in the tutorial](https://discord.com/developers/docs/tutorials/hosting-on-cloudflare-workers#storing-secrets)
|
|
|
|
Rename `example.dev.vars` to `.dev.vars`, and make sure to set each variable.
|
|
|
|
**`.dev.vars` contains sensitive data so make sure it does not get checked into git**.
|
|
|
|
### Register commands
|
|
|
|
The following command only needs to be run once:
|
|
|
|
```
|
|
$ npm run register
|
|
```
|
|
|
|
### Run app
|
|
|
|
Now you should be ready to start your server:
|
|
|
|
```
|
|
$ npm start
|
|
```
|
|
|
|
### Setting up ngrok
|
|
|
|
When a user types a slash command, Discord will send an HTTP request to a given endpoint. During local development this can be a little challenging, so we're going to use a tool called `ngrok` to create an HTTP tunnel.
|
|
|
|
```
|
|
$ npm run ngrok
|
|
```
|
|
|
|

|
|
|
|
This is going to bounce requests off of an external endpoint, and forward them to your machine. Copy the HTTPS link provided by the tool. It should look something like `https://8098-24-22-245-250.ngrok.io`. Now head back to the Discord Developer Dashboard, and update the "Interactions Endpoint URL" for your bot:
|
|
|
|

|
|
|
|
This is the process we'll use for local testing and development. When you've published your bot to Cloudflare, you will _want to update this field to use your Cloudflare Worker URL._
|
|
|
|
## Deploying app
|
|
|
|
This repository is set up to automatically deploy to Cloudflare Workers when new changes land on the `main` branch. To deploy manually, run `npm run publish`, which uses the `wrangler publish` command under the hood. Publishing via a GitHub Action requires obtaining an [API Token and your Account ID from Cloudflare](https://developers.cloudflare.com/workers/wrangler/cli-wrangler/authentication/#generate-tokens). These are stored [as secrets in the GitHub repository](https://docs.github.com/en/actions/security-guides/encrypted-secrets#creating-encrypted-secrets-for-a-repository), making them available to GitHub Actions. The following configuration in `.github/workflows/ci.yaml` demonstrates how to tie it all together:
|
|
|
|
```yaml
|
|
release:
|
|
if: github.ref == 'refs/heads/main'
|
|
runs-on: ubuntu-latest
|
|
needs: [test, lint]
|
|
steps:
|
|
- uses: actions/checkout@v3
|
|
- uses: actions/setup-node@v3
|
|
with:
|
|
node-version: 18
|
|
- run: npm install
|
|
- run: npm run publish
|
|
env:
|
|
CF_API_TOKEN: ${{ secrets.CF_API_TOKEN }}
|
|
CF_ACCOUNT_ID: ${{ secrets.CF_ACCOUNT_ID }}
|
|
```
|
|
|
|
### Storing secrets
|
|
|
|
The credentials in `.dev.vars` are only applied locally. The production service needs access to credentials from your app:
|
|
|
|
```
|
|
$ wrangler secret put DISCORD_TOKEN
|
|
$ wrangler secret put DISCORD_PUBLIC_KEY
|
|
$ wrangler secret put DISCORD_APPLICATION_ID
|
|
```
|
|
|
|
## Questions?
|
|
|
|
Feel free to post an issue here, or reach out to [@justinbeckwith](https://twitter.com/JustinBeckwith)!
|